Posts filed under ‘cookies’
NaBloPoMo: Day 15
My little brother isn’t so little anymore. He’s a college boy now but to me he’ll always be a “little” brother. Since we’re a decade+ in age difference (Yes, he was the uh-oh baby!) sometimes I think of him more than just my brother. I use to change his diapers! So I’m actually kinda maternal about him.
I’m so thankful that we have a great relationship and he comes to visit me at least once a month if not more. I think he needs a calm place outside of his crazy dorm college life sometimes and I’m glad to provide it. This weekend wasn’t much different. He came to visit for dinner and watch the Laker game with Hubs. Usually he’s a very mellow boy. Doesn’t ask for much. Just likes to get a free meal and regale us of his college life. Hubs eats it up. Married life just isn’t as exciting. I think he’s living vicariously through my brother. It’s actually very cute.
But tonight, during his usual pantry raid, he saw my stash of Reese’s Pieces and commented that Reese’s Pieces cookies would be really awesome. Hint *wink* hint.
I read you loud and clear, Brother.

Soft and Chewy Reese’s Pieces Cookies
Recipe adapted from Martha Stewart
Makes about 36 cookies
INGREDIENTS
2-1/4 cups all-purpose flour
1/2 tsp baking soda
1 cup (2 sticks) unsalted butter, room temperature
1/2 cup granulated sugar
1 cup packed light-brown sugar
1 tsp salt
2 tsp pure vanilla extract
2 large eggs
1-1/2 cups of Reese’s Pieces
INSTRUCTIONS
Preheat oven to 350 F. Line baking sheet with Silpat or parchment paper. In a small bowl, sift together the flour and baking soda; set aside.
In a stand mixer fitted with a flat beater, beat the sugars and butter on medium speed until light and fluffy. Reduce speed to low; add the salt, vanilla, and eggs. Beat until well mixed, about 1 minute. Add flour mixture; mix until just combined. Fold in the Reece’s Pieces.


Drop heaping tablespoon-size balls of dough about 2 inches apart on baking sheets lined with parchment paper.


Bake until cookies are golden around the edges, about 8 to 10 minutes. Remove from oven, and let cool on baking sheet 1 to 2 minutes. Transfer to a wire rack, and let cool completely. Store cookies in an airtight container at room temperature up to 1 week.
ENJOY!
Husband rating: A
He’s a peanut butter FA-REAK so you can imagine that his favorite candy is reese’s pb cups and reese’s pieces. He had nothing but good things to say about these cookies and recommends that you have a cup of milk on deck for the perfect combination. The only thing he mentioned was that he preferred a cookie that wasn’t quite that chewy.
Wifey rating: A
I love soft and chewy cookies and these were delicious if you are looking for your Reese’s Pieces fix but this dough is very “wet” to handle in my opinion. Next time I bake these I might add a little more flour or refrigerate the dough before baking. Note to self: Add cookie scoop to Xmas list.
Other rating: A+
My little brother loves reese’s pieces so he ate his weight in these cookies with a HUGE glass of milk. He also declared that I was the best sister in the world too. Ah shucks!
NaBloPoMo: Day 4
Lately I’ve been getting alot of “Wow you’ve lost alot of weight. What diet are you on?” comments from family and friends.
First of all. Thank you! Who doesn’t wanna hear they’ve lost weight right? I’m not a size 2/4 mind you. (Yeah you know I’m talking to you.) Second of all. It’s not intentional. Currently I’m on the In-The-Process-Of-Buying-House-So-I’m-Too-Stressed-To-Eat diet. I don’t think it’s endorsed by Nutri-System (Is Maria Osmond looking good or what?) or Weight Watchers though. So don’t try this at home, readers. I’m a professional.
I keep telling myself that all the stress will be worth it in the end. I’m sure I’ll be singing home ownership’s praises (and packing on the happy pounds) in a couple weeks. But if you ask me right now. It’s not. I’m barely eating (which explains my lack of food posts) and having nightmares about being homeless. That can’t be good. Is this normal? Please tell me this is normal.
Ok don’t answer that. I’m far from normal. House buying or no house buying. HA!
But this semi-normal-slash-crazy girl NEEDED a damn cookie. Thank you Martha Stewart. You saved my sanity. At least for today. No promises for tomorrow though.

Chocolate Caramel Candy Corn Cookies
Recipe adapted from Martha Stewart
Makes 36 cookies (I got 13 cookies)
INGREDIENTS
4 tablespoons unsalted butter, room temperature
1/2 cup sugar
1 large egg yolk
1/4 teaspoon vanilla extract
1/4 teaspoon baking powder
1/4 teaspoon salt
1/2 cup all-purpose flour
1/4 cup unsweetened cocoa powder
About 36 candy corns (I used 13 caramel candy corn)
INSTRUCTIONS
Preheat oven to 350 degrees. Line cookie sheet with silpat or parchment paper. Set aside.
Combine butter and sugar in a stand mixer, fitted with a flat beater. Mix until combined. Beat in egg yolk, vanilla, baking powder, and salt. Add flour and mix until a dough forms.

Scoop out level teaspoons of dough (I used a tbsp instead) and roll into balls. Place balls on baking sheets, 2 inches apart. Bake, rotating sheets halfway through, until edges are firm and cookies are dry to the touch, about 10 to 12 minutes. (I baked for 12 minutes)

Remove from oven and gently press a candy corn into center of each cookie (surface of cookies may crack slightly). Let rest on cookie sheet for about 1 minute before transfering to a rack to cool completely.
ENJOY!
Husband rating: A/A-
He really loved the chocolate cookie but he’s not a huge fan of candy corn. He’s obviously cuckoo.
Wifey rating: A/A+
This recipe was quick and easy to put together. You can’t go wrong with chocolate and caramel. I give this the Cookie Monster seal of approval. Its just what the crazy doctor ordered. *Nom nom nom*
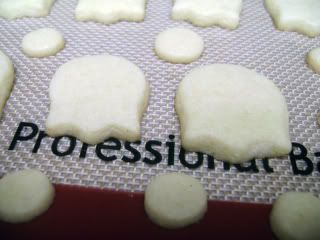
Pacman Sugar Cookies
My husband and I are 80s children. I guess that would make me *doing math in my head*… well… lets just say twenty something closer to thirty something.
If you were an 80s child, you’ll remember this game:

Click the image to play the free online game
Back in my day, games were simple, 2 dimensional and didn’t give you a seizure if you played it. LOL. Ah the good ol days. Now my little cousins and godsons play Grand Theft Auto. Granted the game is fun (I won’t lie) but joining gangs and stealing cars seems to send the wrong message to our impressionable youth, no? Maybe its just me.
Then again T remembers spending hours and many quarters playing Street Fighter 2 at his local arcade. Not Marvel vs. Capcom. Old school Street Fighter. He was always Guile. My brother was always Ryu.
When I questioned my little 7 year old cousin about the validity of stealing cars he gave me an exasperated sigh and replied “Its just a game, Cousin Clara.” HAHA. Kids are so cute. They say the darndest things.
Maybe I just long for simpler days when “debt”, “mortgage”, “foreclosure”, “bailout” and “economic depression” didn’t come up in conversation. It was more about “Santa”, “birthdays”, “gold stars”, “sleepovers” and “tater tots”. Pacman is one of those games that brings me back to simpler days.

Recipe adapted from Snack Or Die
INGREDIENTS
For sugar cookies
Sugar cookie recipe
1″ tulip cookie cutter
1-1/4″ circle cookie cutter
triangle cookie cutter
For royal icing – Makes about 3 cups
3 tablespoons Meringue Powder
4 cups (about 1 lb) confectioners’ sugar
6 tablespoons warm water
Various coloring gel (I used Ateco sky blue, royal blue, deep pink, orange, lemon yellow and super red)
INGREDIENTS
To make cookies—
Preheat oven 350F.
Prepare sugar cookie dough per recipe directions.
Roll out dough to about 1/4 inch thick between 2 pieces of wax paper. Cut out “energy dots” with small end of 1A piping tip and “power dots” with wide end of #12 piping tip, “Pacman” with circle cookie cutter (with triangle point cut out for mouth), “ghosts” with tulip cookie cutter.


[NOTES: Try to keep the thickness about 1/4 inch or maybe even a little less and chilled as possible before baking. If its too thick and/or soft it tends to spread more while baking and doesn’t hold shape as well. Example.]
Bake cookies for about 8 minutes. Cookies should feel firm but not color much. Allow cookies to cool completely before decorating.


While cookies are cooling, prepare the royal icing.
To make royal icing—
Beat all ingredients until icing forms peaks (7-10 minutes at low speed with a heavy-duty mixer, 10-12 minutes at high speed with a hand-held mixer).


To assemble cookies—
Divide up in bowls and color with coloring gel. (Leave some uncolored for white.) Fill parchment piping bag (or zip lock bag) with white icing and snip off a little tip to start outlining the cookies. Let icing set.
[NOTES: You could always switch it up and create the outline “dam” with the same color as the ghosts or pacman but I like the white contrast myself.]


[NOTES: I color the icing one color at a time so that if I run out of a certain color I can always add more white+gel to make more until I am ready for the next color.]


Prepare a piping bag for each color. If the icing is too stiff you can add a little water to get it to the flooding consistency that you want before filling the piping bag.


To make Pacman: Fill the cookie within the outline with yellow icing. Let cookie set.
To make energy and power dots: Fill cookie with white icing. Let set.
To make ghosts: Fill the cookie within the outline with red, orange, pink or sky blue depending on the ghost you’re making. Once icing is firm, add 2 white eye dots per ghost. Let set before adding a dark blue dot on top of the white for eyeball.

To make blue ghosts: Fill the cookie within the outline with royal blue icing. Once the icing is firm, pipe white icing for eyes and zigzag mouth.
ENJOY!
Husband rating: A+
He absolutely loved them. At first he didn’t want to eat them. He’d rather play an imaginary pacman game with them but after popping one energy dot into his mouth he was hooked on the cookie.
Wifey rating: A+
These were so fun to make. It does take some patience and alot of time but they were worth it to see my husband’s face light up like a little boy. The fact that its all cookie cutters makes it easier. He thought it was so ingenious to use a tulip cutter for the ghosts. Wish I could take credit for that one b/c that *was* pretty darn smart.
Operation Baking GALS: Raspberry Lemon Thumbprint Cookies
 If you spend any time trolling the foodie blogosphere (like me), you know what the logo to the left is. Operation Baking GALS (an acronym for Give A Little Support) was started by a Doughmesstic Don’t you just love her blog name? blogger named Susan.
How it all started: Originally I got an email from Susan during the first round of Operation Baking GALS about her cousin fighting in Iraq. You can read the whole email here.
Unfortunately I wasn’t able to participate in round one but I always kept it in the back of my mind. I knew I would participate given the chance again. That chance came in the form of Steph from Steph Chows. Steph is one of the hosts for round 2 of Operation Baking GALS. When I read via her blog about forming a GALS team, I knew I’d be enlisting. (A little army humor for ya! HAHA)
Whether you are for or against the war its hard not to know someone who isn’t involved in the war. T’s bff from high school is stationed near Fallujah right now. He has a wife and a 8 year old son, named Zack. Being a newlywed (well its been 13 months but close enough) I can’t imagine being away from my husband, much less my child (Just FYI, if my MIL is reading this, No I am not pregnant). So I decided to take this opportunity to send him some cookies too. You all know how much I love 2fors!
I plan to ship the cookies with a California related (probably disneyland or beach scene) postcard. Isn’t that a cute idea? Who doesn’t like getting postcards? I know I do!
If you would like to be a baking GAL, email —> bakingGALS [at] gmail [dot] com


(Recipe from Emeril Lagasse, foodnetwork.com | photos from me!)
Makes about 4 dozen cookies
INGREDIENTS
1/2 cup raspberry jam or jelly (I used raspberry preserves)
1 tablespoon Chambord or kirsch (I used chambord)
2-1/4 cups all-purpose flour
1 teaspoon baking powder
1/4 teaspoon salt
2 sticks (1 cup) butter, at room temperature
2/3 cup sugar
2 large egg yolks
1 tablespoon finely grated lemon zest
1 tablespoon fresh lemon juice
1 teaspoon pure vanilla extract
INSTRUCTIONS
Preheat the oven to 350 degrees F. Lightly butter 2 large baking sheets.
In a small bowl, combine the jam and Chambord. Stir to combine.
In a medium bowl, combine the flour, baking powder, and salt and whisk to blend. In a large bowl using an electric mixer, beat the butter and sugar until light and creamy. Beat in the egg yolks, lemon zest, lemon juice and vanilla. Add the flour mixture in 2 additions and beat just until moist clumps form. Gather the dough together into a ball.


Pinch off the dough to form 1-inch balls. Place on the prepared baking sheets, spacing 1-inch apart. Use your floured index finger or 1/2 teaspoon measuring spoon to create depressions in the center of each ball. Fill each indentation with nearly 1/2 teaspoon of the jam mixture.


[NOTES: I weigh each ball of dough on my kitchen scale at about 0.5 oz. I also lightly floured the back of my teaspoon so that the cookie dough didnt stick to it. It worked great!]


Bake until golden brown, about 20 minutes. Transfer the cookies to wire racks to cool completely.

ENJOY! :)
Husband rating: A+
He still claims he’s on a diet but he ate more than 1 cookie! Muhahaha. I am such a saboteur huh?
Wifey rating: A+
Ohmygod. These cookies are so freaking good! I won’t tell you how many I ate. Imagine the possibilities. You could use any berry preserves/jam/jelly and even switch up the lemon for a lime. YUM! Definitely will make again!
Bonus Bunday
My cooking and baking are usually inspired by something. My baking group, a picture, a craving etc. This time it wasn’t any of the above.
I was cleaning my cluttered baking supply drawer when I noticed these cutesy little cookie cutters that I bought from Williams Sonoma last month but never used yet. It comes with the usual shapes – heart, star, square etc. Then I saw the club and tear drop cookie cutter and they jumped out at me. All the sudden I was in the mood to bake cookies! But not just any cookies. Carrot shaped cookies for… my bunnies!

Tell me that doesn’t look like a carrot!?!
I’ve been wanting to bake this recipe for a long time but I’ve been spoiled by another bunny friend who actually bakes them in HUGE batches and ships some to me. Unfortunately my bunnies ran out of their favorite far away cookie a couple weeks ago. sniff. Since necessity is the mother of invention… err… baking, it was up to momma bunny (me) to bake up some more!
Bunny Biscuits

(Recipe from Rabbit.org | photos from me!)
Makes about 40 little cookies
INGREDIENTS
1 small carrot, pureed* (I used 5 baby carrots)
1/2 banana, mashed until really creamy
1 tbsp honey
1/4 cup rabbit pellets, ground finely in a coffee grinder (I use Oxbow Bunny Basics pellets)
1/4 cup ground oats, ground finely in a coffee grinder (Old fashion oats NOT quick oats)
*To puree carrot: Boil water (just enough to cover carrots). Chop carrot into smaller pieces. Turn down heat and let carrots simmer for about 15 minutes until soft. Drain water. Puree carrot in a food processor. Let cool.

INSTRUCTIONS
Mix pureed carrot, banana and honey in a medium bowl. Add pellet powder and ground oats. Mix until blended. Knead in your hands for 1-2 minutes.


Roll out the “dough” in 1/8- to 1/4-inch thick layers between sheets of plastic wrap. Cut into small cookies (about 3/4 inch across). Place cut shapes onto a parchment paper covered cookie sheet.
[NOTES: I like to use parchment paper b/c it keeps the cookies from sticking without adding any grease.]


Bake at 325 degrees for about 30 minutes (check to make sure they are not browning too much). Let completely cool before feeding to bunnies.
[NOTES: Please remember these are treats and should be given sparingly to avoid upset bunny tummies.]
ENJOY! :)
Bunny rating: A++
Both OpieBun and Snickerdoodle LOVE these cookies. I tried to get a picture but they were too quick for me and gobbled them up before my camera could flash! Obviously they must be goooooood!
I also included another bunny treat recipe after the cut. I haven’t tried it yet but its on my must-bake bunny list!
Chocolate Cakesters
I’ve never eaten a store bought cakesters before but I’ve seen them during many a grocery shopping experience. I imagine that this recipe is pretty close. Actually its probably even better! Just tooting my own horn here, people!
I know I am gonna get so much crap for using a cake mix *cough NIKKI cough* but before you push the delete button… hear me out!
I am not anti-cake mix esp if you use it as another ingredient and not the star of the show. I found the original recipe online back in the day when I could barely do more than microwave so its a little nostalgic for me. I was a little apprehensive the first time so I did it the easy way – cake mix and canned frosting – but this time I decided to do it a little more scratch to hopefully satisfy my curiosity about canned frosting vs homemade debate.
Even though its semi-homemade, the recipe is a little time consuming and I am choosy about when I make them but when T’s students requested it for their end of the year pot luck party, I couldn’t say no. T thinks its crazy that they can’t remember their city councilman or presidents for the test but they remember cookies that I made for them at the beginning of the year. Gotta love kids. They know their priorities!

(Recipe adapted from allrecipes.com | photos from me!)
Makes about 80 cookies or 40 cookie sandwiches
INGREDIENTS
For cookie
2 (18.25 ounce) packages devil’s food cake mix
4 eggs
1 cup shortening
For frosting filling
8oz cream cheese, room temperature
1 tsp vanilla extract
1 cup (2 sticks) butter, room temperature
1 lb (~4 cups) powdered sugar, sifted
[NOTES: To save time you can use a can of pre-made cream cheese frosting too]
INSTRUCTIONS
To make cookies—
Preheat oven to 350 degrees F (180 degrees C).
Blend the above ingredients together with a pastry blender until mixed. Roll in balls about the size of a quarter and place on ungreased baking sheets. Make an even number of balls.
[NOTES: I used my KA mixer and flat beater to blend the ingredients a little then used my spatula to really combine everything.]


[NOTES: Call me anal or OCD but I think its easier to weigh the balls of dough with my kitchen scale so that they are all the same size when they bake therefore your sandwich is uniform. I weighed mine at about 0.5 – 0.6 oz for each ball.]
Bake for 10 minutes. Let cookies stand on cookie sheet for 5-6 minutes before removing them to cooling rack.
To make frosting—
Whip the butter and cream cheese together in a mixer fitted with a paddle attachment until creamed. Add vanilla extract. Gradually add powdered sugar to the butter-cream cheese mixture. Scrape down the bowl as needed.
To assemble—
After cookies have cooled, use a spatula and spread some frosting between two cookies, putting bottom sides together. Roll sides in sprinkles for additional fun!
Click image to enlarge
ENJOY! :)
Husband rating: A+
He loves this cookie and said its almost as good as the peanut butter ones… almost.
Wifey rating: A+
I could easily eat all 40 sandwich cookies by myself. They are a moist cookie-cake and the combination of frosting is SO good! But I can’t believe I am saying this… I think the canned frosting is better for this recipe than the scratch. Something about canned frosting. I have eaten it for breakfast on more than one occasion.
Other rating: A++
T said he opened up the tupperware and the kids pummeled him to the ground to get a cookie. After about 10 seconds (he can’t remember exactly how long b/c he got knocked to the ground) the cookies were gone and many students wanted the recipe.
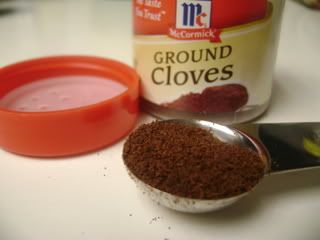
Think Spice #1: [Cloves]
 I am addicted to foodie blog events!
When I saw that fellow TWDer, Gretchen, was hosting her own foodie challenge, I knew that I wanted to contribute since she always indulges my blog posts with sincere compliments, suggestions and wit. She’s one of those readers that makes you want to keep blogging just so you can get a comment from her. Or maybe I am just a CW. Take your pick. LOL. Since she knows that I am a cupcake fanatic she even suggested that a clove cupcake would be very cool. ::winkhintwink::
Now usually I would bake cupcakes for any blog event but after baking 48 red velvet cupcakes for T’s class tomorrow (Isn’t he a dedicated teacher, working on Saturday?), I was cupcake-ed out. Since I wasn’t in a cupcake mood, I decided to bake some cookies!
I’ve had cookies on the brain ever since seeing fellow TWDer, Donna‘s, blog who’s having a Martha Stewart Cookies book giveaway. But don’t bother going to her blog. I don’t need more competition. ;)
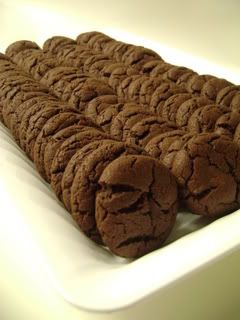
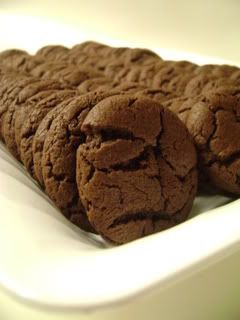
Honey Pecan Snaps

(Recipe from allrecipes.com | photos from me!)
Makes about 30 cookies
INGREDIENTS
1/4 cup butter or margarine, softened
1/4 cup shortening
3/4 cup sugar
1/4 cup honey
1 eggs
1 tablespoon lemon juice
2 cups all-purpose flour
1-1/4 teaspoons baking soda
1/2 teaspoon ground cloves
1/2 teaspoon ground cinnamon
1/4 teaspoon ground ginger
1/4 teaspoon salt
1/2 cup chopped pecans
Additional sugar for dusting
INSTRUCTIONS
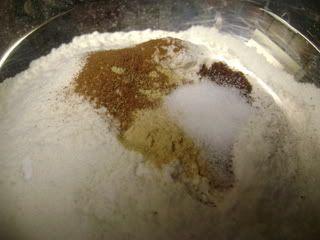
In a mixing bowl, cream butter, shortening and sugar until fluffy. Add honey, eggs and lemon juice; beat well. Combine dry ingredients; gradually add to creamed mixture. Fold in pecans.
Click image to enlarge
Shape into 1-in. balls; roll in sugar. Place on ungreased baking sheets. Bake at 350 degrees F for 12-13 minutes or until golden brown. Cool 2 minutes; remove to wire racks.

Click image to enlarge
ENJOY! :)
Husband rating: A+
He likes spice type cookies, cakes etc so he really liked this cookie. He ate alot more than one ;)
Wifey rating: A
I wasn’t sure what to expect but this cookie was moist with great flavors – cinnamon and cloves – and the crunch from the pecans was very good.
Other rating: A
T’s bff said it was a good cookie even though he doesn’t really like “spice” flavors. He prefers pb and/or chocolate instead.
Erin’s Ultimate Sugar Cookies
I was lucky enough to get my dear friend April as my secret baker during the January baked goods exchange and she did not disappoint! I pre-maturely squealed when her package came in a cheesecake box but alas my cheesecake dreams were dashed when her letter explained that it was just a box. :(
(I am so dramatic sometimes… LOL.)
She originally tried to make me one of my favorite candies, York Peppermint Patties, but for some reason her minty filling never solidified! Bummer! But plan B was to send me some of her friend, Erin’s, “secret” sugar cookie recipe.
OH.MY.GOD. Best sugar cookie EVER. (My cheesecake disappointment was long forgotten after taking that first sugar-cookie-bite. haha) I ate them all by myself in one sitting. T didn’t even have a chance to get one bite! Hey… you snooze you don’t get cookie!
Thank you Erin for making me fat sharing your recipe with April (and me)!

(Recipe from WineLoversCookingDiary | photos from me!)
INGREDIENTS
1/2 cup shortening
1 cup sugar
2 eggs
2 tbsp milk
1 tbsp vanilla
2 tbsp baking powder
3-1/2 cups cake flour
INSTRUCTIONS
Preheat oven to 375 F.
Cream shortening and sugar together. Add well beaten eggs. Sift dry ingredients together. Mix dry ingredients with shortening/sugar mixture.
Roll out on floured surface. Cut into shapes. Bake for 8 minutes.
ENJOY! :)


Husband rating: N/A
Wifey rating: A+++
I ate every cookie and every crumb in one sitting. Enough said. ;)
December SBGEX
I <3 Secret Baker Gift Exchanges! December IS the perfect month because tis the season for baking!

This month I was lucky enough to get MICHELE as my secret baker. She spoiled me with 4 gift bags filled with chocolate mint snow top cookies along with various chocolate candies. (There are only 3 bags pictured since I already ate one whole bag!!) She even included nutritional information. Not sure I really wanted to know though! LOL.
THANKS MICHELE!
————————-
Chocolate Mint Snow Top Cookies
Makes 48 servings (1 cookie=1 serving)
Calories/serving = 46
INGREDIENTS
1-1/2 cups AP flour
1-1/2 tsp baking powder
1-1/2 cups semisweet chocolate pieces
6 tbsp butter, softened
1 cup granulated sugar
1 tsp salt
2 eggs
1-1/2 tsp vanilla
1/4 tsp mint flavoring
powdered sugar
INSTRUCTIONS
> Combin flour, baking powerd and 1/4 tsp salt
> In saucepan, heat 1 cup of chocolate pieces over low heat until melted, stirring constantly
> Beat butter with mixer on medium speed for 30 secs. Beat in granulated sugar until combined
> Beat in melted chocolate, eggs, vanila and mint flavoring
> Stir in flour mixture and remaining chocolate pieces
> Wrap dough in plastic wrap and freeze for 30 minutes or until firm enough to shape
> Preheat oven 350 F
> Shape dough into 1 inch balls
> Roll balls in powdered sugar
> Place balls about 2 inches apart on ungreased cookie sheet and bake for 10-12 minutes or until tops crackled
> Cool 2 minutes on cookie sheet before transfering to wire racks.
ENJOY!
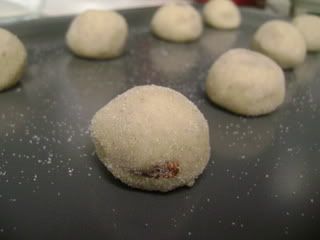
CWCCO Cookies
Second times the charm! I decided to try these cookies again for Thanksgiving (what better cookie than a cranberry cookie right? LOL). After contacting MrsPresley, who I got the original recipe from – she explained that she used instant oats while I used old fashion whole oats the first time and maybe that might be the reason for my thin dough? Version 2 definitely came out better with her suggestion!
PS- To all my beloved foodie friends… HAPPY TURKEY DAY!

(Recipe from GoodEatsNSweetTreats | photos from me!)
Cranberry White Chocolate Chip Oatmeal Cookies
Makes ~72 servings (1 cookie=1 serving)
Calories/serving = ~90 (www.sparkrecipes.com)
WW pts/serving = ~2
INGREDIENTS
3 eggs, well beaten
1 cup dried cranberries
1 tsp. vanilla
1 cup butter, softened
1 cup brown sugar
1 cup white sugar
2 ½ cup flour
½ tsp salt
1 tsp ground cinnamon
2 tsp. baking soda
2 cups instant oats
1 cup white chocolate chips
COOKING INSTRUCTIONS
> Preheat oven to 350 degrees. Combine eggs, dried cranberries and vanilla and let stand for 1 hour, covered with plastic wrap.
> Cream together butter and sugars. Add flour, salt, cinnamon and soda to sugar mixture. Mix well.
> Blend in egg-cranberry mixture and oatmeal. Dough will be stiff.
> Fold in the white chocolate chips.
> Drop by heaping teaspoonfuls onto un-greased cookie sheet or roll in small balls and flatten slightly on cookie sheet. Bake for 10-12 minutes or until lightly browned.
ENJOY! :)

Husband rating: A+
Wifey rating: A+
I am usually not a huge fan of oatmeal cookies but these were yummy!
Family rating: A+
Best cookies I’ve ever had, even better than mommy’s! -Todd’s 10 year old cousin
Foodie friend rating: A+
(see comment!)

(Todd’s 10 year old cousin was also the ring boy at our wedding. You can tell from the picture that he LOVED our cocktail hour magician! LOL)
Cake Cookies
These cookies will have a special place in my baking heart now b/c they gave me my first baking battle scar. I was putting the cookie sheet into the oven and my hand didn’t slip out quite as fast and my finger touched the HOT oven shelf. *&(^&%$#@. My poor wittle finger. It really hurts.

(Recipe from OneTinyPinkKitchen | photo from me!)
Makes 36 cookies (1 cookie=1 serving)
WW pts/serving = 1
[NOTE: You can probably tell from the picture but I made my cookies bigger so I made 18 cookies ie 1 cookie=2 pts. Serving size is important to remember!]
INGREDIENTS
1 cake mix (pictured: Pillsbury Funfetti)
1/2 cup unsweetened applesauce
1/2 cup Eggbeaters
[NOTES: I forgot it was suppose to be unsweetened applesauce so you can definitely taste the applesauce but its not a bad thing though.]
COOKING INSTRUCTIONS
> Preheat oven to 350 degrees.
> Mix all ingredients together well.
> Drop onto ungreased cookie sheet
> Bake for about 12 minutes until set. Allow to cool for 3-5 minutes on sheet before transferring them to waxed paper or cooling rack.
ENJOY! :)

Husband rating: A
I told him the ingredients and he said they were better than he thought they’d be.
Wifey rating: A
Its yummy for a low cal cookie.
Homemade Chocolate Sandwich Cookies
This week has been very stressful (family drama, friend drama, planning my friend’s baby shower etc etc) and I needed to de-stress so I decided to make some cookies. I can see why many ppl turn to chocolate when life gives them lemons. I’d prefer chocolate to lemonade anyday! ;)

(Recipe from www.allrecipes.com | photos from me!)
Makes 12 sandwich cookies (1 sandwich=1 serving)
Calories/serving = 551
WW pts/serving = 13
[NOTES: I cut the recipe in 1/2 and made 18 sandwiches (~2.5inch diameter cookies). Guess mine were smaller than the original recipe? *shrugs*]
INGREDIENTS
2 (18.25 ounce) packages devil’s food cake mix
4 eggs
1 cup shortening
COOKING INSTRUCTIONS
> Preheat oven to 350 degrees F (180 degrees C).
> Blend the above ingredients together with a pastry blender until mixed.
> Roll in balls about the size of a quarter and place on ungreased baking sheets. Make an even number of balls.
> Bake for 10 minutes. Let cookies stand on cookie sheet for 5-6 minutes before removing them to cooling rack.
> After cookies have cooled, put Cream Cheese Frosting (or use one can of pre-made frosting) between two cookies, putting bottom sides together.
* TIP: Adding chopped pecans to the cookies without making them into sandwiches is also very good. Spice cake mix can be used in place of Devil’s food.
[NOTES: I am renaming these cookies: Chocolate Cream Cheese Frosting Sandwich Cookies or CCCFSC for short. :) The original name doesn’t do them justice!]
ENJOY! :)

Husband rating: A+
He says they are TOO good.
Wifey rating: A+
omg. yum. They were so rich that I could only eat one but wanted another one! LOL
Husband’s CW: A+
He said, “Its ridiculous how good these cookies are!”
Iced Pumpkin Cookies

(Recipe from www.allrecipes.com | photo from me!)
Makes 36 cookies (1 cookie=1 serving)
Calories/serving = 122
WW pts/serving = 3
INGREDIENTS
2 1/2 cups all-purpose flour
1 teaspoon baking powder
1 teaspoon baking soda
2 teaspoons ground cinnamon
1/2 teaspoon ground nutmeg
1/2 teaspoon ground cloves
1/2 teaspoon salt
1/2 cup butter, softened
1 1/2 cups white sugar
1 cup canned pumpkin puree
1 egg
1 teaspoon vanilla extract
Glaze
2 cups confectioners’ sugar
3 tablespoons milk
1 tablespoon melted butter
1 teaspoon vanilla extract
COOKING INSTRUCTIONS
> Preheat oven to 350 degrees F (175 degrees C).
> Combine flour, baking powder, baking soda, cinnamon, nutmeg, ground cloves, and salt; set aside.
> In a medium bowl, cream together the 1/2 cup of butter and white sugar.
> Add pumpkin, egg, and 1 teaspoon vanilla to butter mixture, and beat until creamy.
> Mix in dry ingredients. Drop on cookie sheet by tablespoonfuls; flatten slightly.
> Bake for 15 to 20 minutes in the preheated oven. Cool cookies, then drizzle glaze with fork.
To Make Glaze:
Combine confectioners’ sugar, milk, 1 tablespoon melted butter, and 1 teaspoon vanilla. Add milk as needed, to achieve drizzling consistency.
ENJOY! :)
Husband rating: A+10
He said this cookie has replaced the PB cookie as favorite! I can’t believe it!
Wifey rating: A+
I am not a big pumpkin fan but these were so yummy! Definitely will make again.
Chocolate Chip Pumpkin Cookies
I was definitely in the baking mood this weekend. Here’s my 2nd cookie. One of Todd’s best friend came over for dinner and the Seattle vs. New Orleans football game so I made these for dessert. I couldn’t make them fast enough! They kept asking me for more! :)
.jpg)
.jpg)
(Recipe from www.allrecipes.com | photos from me!)
Makes ~24 cookies (1 cookie=1 serving)
Calories/serving = 146
WW pts/serving = 3
INGREDIENTS
1 cup white sugar
1/2 cup shortening
7.5 oz pumpkin puree
1 teaspoon vanilla extract
2 cups all-purpose flour
1 teaspoon baking soda
1 teaspoon ground cinnamon
6 ounces semisweet chocolate chips
COOKING INSTRUCTIONS
> Preheat oven to 375 degrees F (190 degrees C).
> Cream the sugar, shortening, pumpkin and vanilla together. Mix until light and well combined.
> Mix the flour, baking soda and ground cinnamon. Stir the flour mixture into the creamed mixture. Mix until combined. Stir in the chocolate chips.
> Drop by teaspoons onto an ungreased baking sheet. Bake at 375 degrees F for 12 to 15 minutes or until set. Let cookies cool on a rack.
** TIP: Can substitute pumpkin pie filling instead of the puree.
ENJOY! :)

Husband rating: A+
He said “almost as good as the PB cookies… almost.”
Wifey rating: A
I liked them but not a huge pumpkin fan
Friend rating: A+
He even asked to take some home! LOL
One more picture from fellow foodie bride, Nikki. She wasn’t my SB but I was so proud of my cookies I had to send a couple to my “mentor”. :)

(photo from CrazyDeliciousFood)
Best Peanut Butter Cookies Ever!
One of my hubbie’s favorite simple snacks is peanut butter. Its not unusual to find him sitting on the couch, watching TV with a butter knife and jar of Skippy creamy PB. To say that he *loves* it would be an understatement.

(Recipe from IllTakeThatRecipe | photo from me!)
Makes ~24 cookies (1 cookie=1 serving)
Calories/serving = ~100
Ingredients:
1 cup creamy peanut butter
1 cup sugar
1 egg
3/4 tsp vanilla
1 tsp baking soda
pinch of salt
Cooking instructions:
> Stir together sugar and peanut butter until well mixed
> Beat in egg, vanilla, baking soda and salt
> Put dough into the fridge for 15 minutes.
> Preheat oven to 350
> Form dough into 2 inch balls and use a fork to spread the cookies and make criss-cross pattern on the top
> Bake for 10 minutes, remove and allow to cool on baking sheet for 5 minutes.
> Transfer cookies to rack to cool completely.
ENJOY! :)


Husband rating: A+10
Wifey rating: A+


